Water pooling around your foundation can cause thousands of dollars in structural damage. Installing sump pump drainage outside your home directs water safely away from your property.
We at Ace Plumbing & Sewer help homeowners in Burr Ridge, Hinsdale, and Clarendon Hills protect their foundations through proper drainage systems. This guide walks you through the complete installation process.
Understanding Sump Pump Drainage Systems
How Sump Pump Drainage Systems Function
A sump pump drainage system collects groundwater from around your foundation and pumps it away through discharge pipes. The Federal Emergency Management Agency provides disaster resources and safety information, which makes proper drainage systems vital for home protection. The system includes a sump pit, pump, discharge line, and exterior drainage components that work together to move water at least 20 feet from your foundation.
Discharge Line Options for Maximum Effectiveness
Standard discharge systems use 4-inch PVC pipes that connect to your sump pump and extend outside your home. Black flexible PVC Schedule 40 pipe provides optimal water flow and durability for most installations. French drain connections can enhance efficiency by directing surface water toward your pump system. Battery backup systems protect your home during power outages (which commonly occur during severe storms when you need drainage most).
Foundation Protection Through Strategic Water Management
Water damage can cost homeowners between $1,322 to $5,954 to restore. Proper drainage prevents hydrostatic pressure buildup that causes foundation cracks and basement flooding. The U.S. Army Corps of Engineers found that sump pumps reduce basement flooding risk by up to 90% when properly installed.

Homeowners in Burr Ridge, Westmont, and Hinsdale face unique challenges with clay soil that retains water, which makes effective drainage systems even more important.
Site Assessment Requirements for Successful Installation
Your property’s specific conditions determine the most effective drainage approach. Soil composition, slope grade, and existing water flow patterns all influence system design. Professional assessment identifies potential obstacles like utility lines or landscaping features that could affect installation. The next step involves careful planning to choose optimal discharge locations that comply with local regulations.
Planning Your Outdoor Drainage Installation
Property Assessment Fundamentals
Slope analysis forms the foundation of successful drainage plans. Properties need adequate grade to move water effectively away from foundations. Use a 4-foot level and tape measure to check slopes around your home’s perimeter. Clay soil common in Burr Ridge and Westmont retains water longer than sandy soil, which requires discharge points at least 25 feet from structures instead of the standard 20 feet. Check existing water patterns during heavy rainfall to identify problem areas where water pools or flows toward your foundation.

Strategic Discharge Location Selection
The optimal discharge location sits downhill from your sump pump with clear flow paths to storm drains or natural water areas. Avoid water discharge onto neighbor properties or sidewalks, which violates most municipal codes. Position discharge points where water can flow naturally without erosion or pooling issues. Municipal storm sewers provide the best discharge option when available, but require proper connections and backflow prevention devices. Properties without storm sewer access need discharge areas with adequate soil absorption capacity and proper grade to prevent water return.
Building Code Compliance Requirements
Burr Ridge requires 6-inch minimum diameter primary discharge pipes and cleanouts at grade changes with 400-foot maximum space between access points. Hinsdale and Clarendon Hills mandate similar specifications but allow 4-inch pipes for residential applications. Contact your local department for permits before installation – most municipalities require permits for exterior plumbing work that connects to storm systems. Non-metallic discharge lines need tracer wire installation for future maintenance access (which prevents costly excavation to locate buried pipes). Professional consultation prevents costly code violations and provides proper permit documentation.
Site Preparation and Material Selection
Site preparation involves marking utility lines and checking for underground obstacles that could complicate installation. Call 811 before digging to mark gas, electric, and water lines. Choose discharge pipe materials based on your climate and soil conditions – PVC works well in most situations but may need insulation in areas prone to freezing. Calculate the total pipe length needed from your sump pump to the final discharge point, adding 10% extra for connections and potential route adjustments. With your assessment complete and materials selected, you can move forward with the actual installation process.
Step-by-Step Installation Process
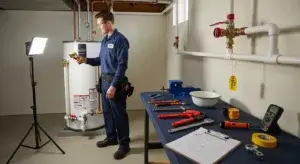
Essential Tools and Materials
Collect all necessary tools before you begin your sump pump drainage installation. You need a trenching shovel, 4-foot level, tape measure, hacksaw for PVC pipe cuts, and pipe fittings that include elbows and couplers. Purchase 4-inch PVC Schedule 40 pipe for the main discharge line, though 6-inch diameter provides better performance for high-volume systems in Burr Ridge and Westmont where clay soil creates drainage challenges. Add pipe primer, PVC cement, and gravel for proper foundation support around connections.

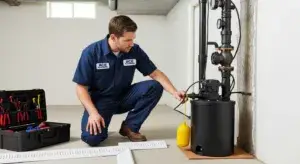
Main Discharge Line Installation
Begin installation at your sump pump discharge port and work outward toward your chosen endpoint. Cut PVC pipe sections to fit your planned route and leave 6-inch gaps at joints for thermal expansion. Connect the first section directly to your pump discharge with a check valve to prevent backflow during heavy rain events. Slope the entire discharge line at minimum 1/4 inch per foot away from your foundation to avoid city code violations and ensure proper drainage to storm drains or downhill areas.
Proper Water Flow Creation
Dig trenches 18 inches deep for buried sections to prevent freeze damage in winter months common to Clarendon Hills and Hinsdale. Install the discharge pipe with gentle curves instead of sharp 90-degree turns that restrict water flow and create pressure buildup. Place large stones around pipe connections to prevent soil settlement that could damage joints over time. The final discharge point needs splash blocks or extension pipes that direct water at least 25 feet from any structure.
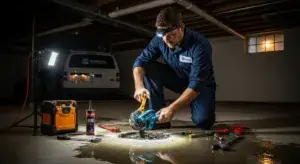
System Testing and Verification
Test your completed system by running water through the discharge line to verify proper flow and check for leaks at all connection points. Pour water directly into the sump pit to activate the pump and observe the complete discharge cycle. Monitor water flow at the endpoint to confirm adequate volume and proper direction away from your foundation (this prevents water from returning to cause future problems). For complex installations or emergency plumbing situations, consider professional assistance.
Final Thoughts
Professional installation provides significant advantages over DIY approaches for sump pump drainage outside your home. Licensed contractors understand local codes in Burr Ridge, Westmont, and Hinsdale, which prevents costly violations and rework. We at Ace Plumbing & Sewer handle complex installations that require permits and storm sewer connections.
Monthly testing keeps your system functional for years. Pour water into the pit and check discharge flow to verify proper operation. Clean debris from the sump basin twice yearly and inspect discharge pipes for clogs or damage (winter preparation includes pipe insulation to prevent freeze damage).
Call a licensed plumber when you notice water backup, unusual pump cycles, or discharge pipe damage. Emergency situations like pump failure during storms require immediate response to prevent foundation damage. We provide same-day service for urgent drainage issues throughout the western Chicago suburbs.